Glovius for Azure
This document describes complete guide to Glovius for Azure
This document will also cover the setup for Glovius Android App
- Glovius Cloud on Microsoft Azure delivers next-generation Web Visualization Solution that enables access to 3D CAD data for organizations.
- Glovius Cloud is a Software-as-a-Service (SaaS) cloud-based web application which provides access to 3D CAD data anytime, anywhere.
- Designed to ensure easy, consistent deployment for the most efficient systems and applications uptime with minimal disruption using Azure Load Balancer and Virtual machine scale set of Glovius Cloud.
- Requiring no hardware or software, solution is deployed to organization's Azure account seamlessly.
- Glovius for Azure is available to only users in your organization, You can publish it to an your internal catalog.
- Solution works with your Azure AD, no separate authentication is needed.
- Although customers deploy this managed application in their subscriptions, they don't have to maintain, update, or service it. Customers don't have to develop application-specific domain knowledge to manage this application.
- Solution is compliant with organizational standards.
This section describes step by step instructions of how to deploy Glovius Cloud
Prerequisite
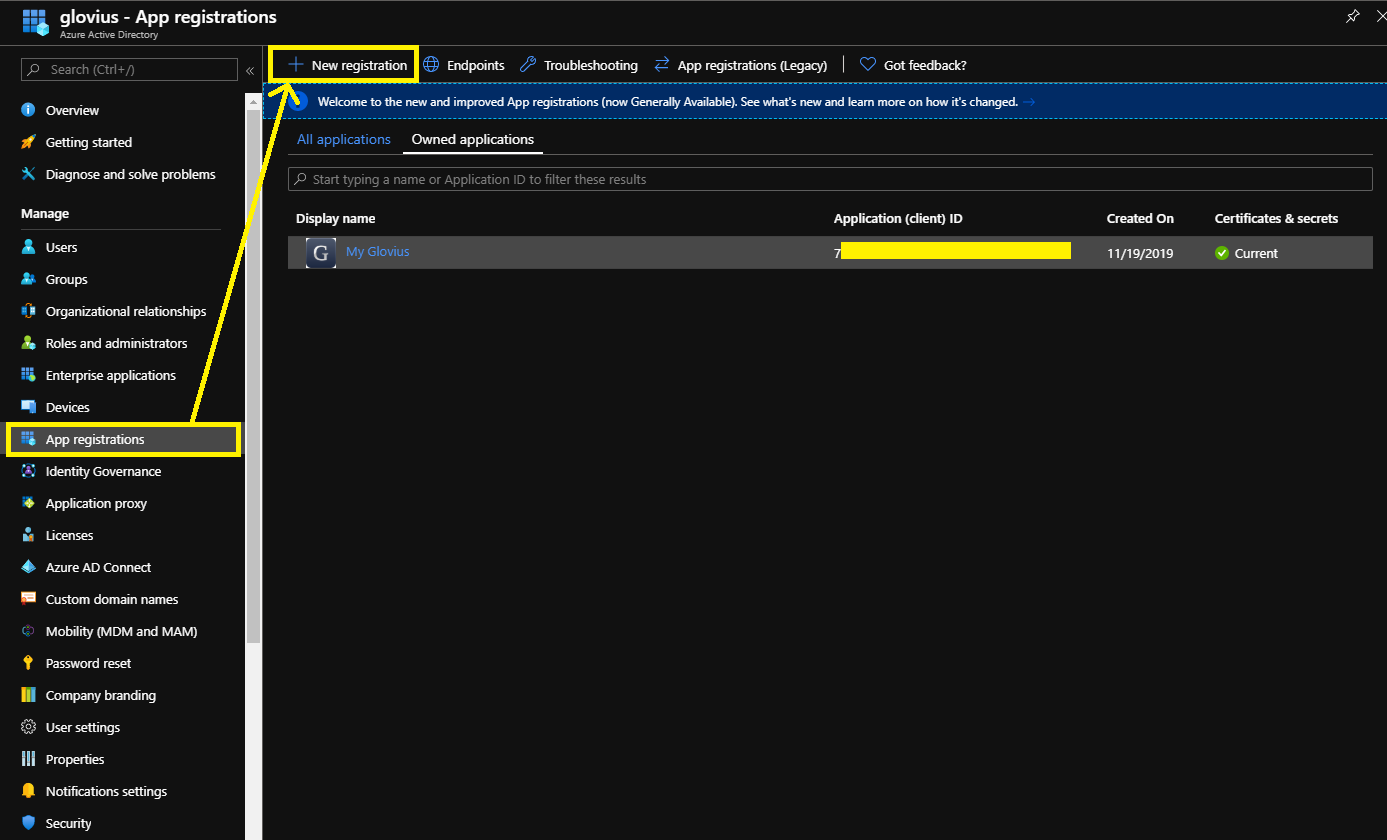
This section contains step by step instructions of how to setup Azure Active Directory authentication to Glovius Web application in the Azure Portal.1. In the Azure Active Directory pane click on App Registrations and choose New application registration
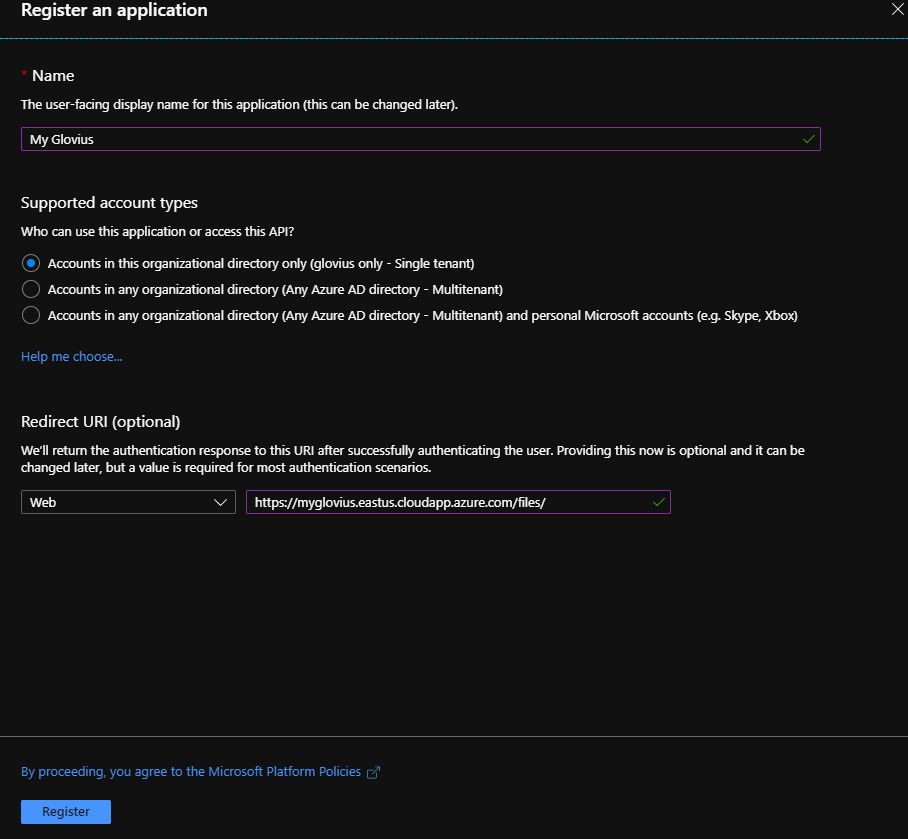
2. Register Azure AD application by providing Name of the application and Supported Account types for your web application.
Provide Redirect URI as https://< app_name >.< location >.cloudapp.azure.com/files/ e.g. https://myglovius.eastus.cloudapp.azure.com/files/. You may set the Reply URI after deploying the Glovius application. But this step is essential in order to access the Glovius application securely.
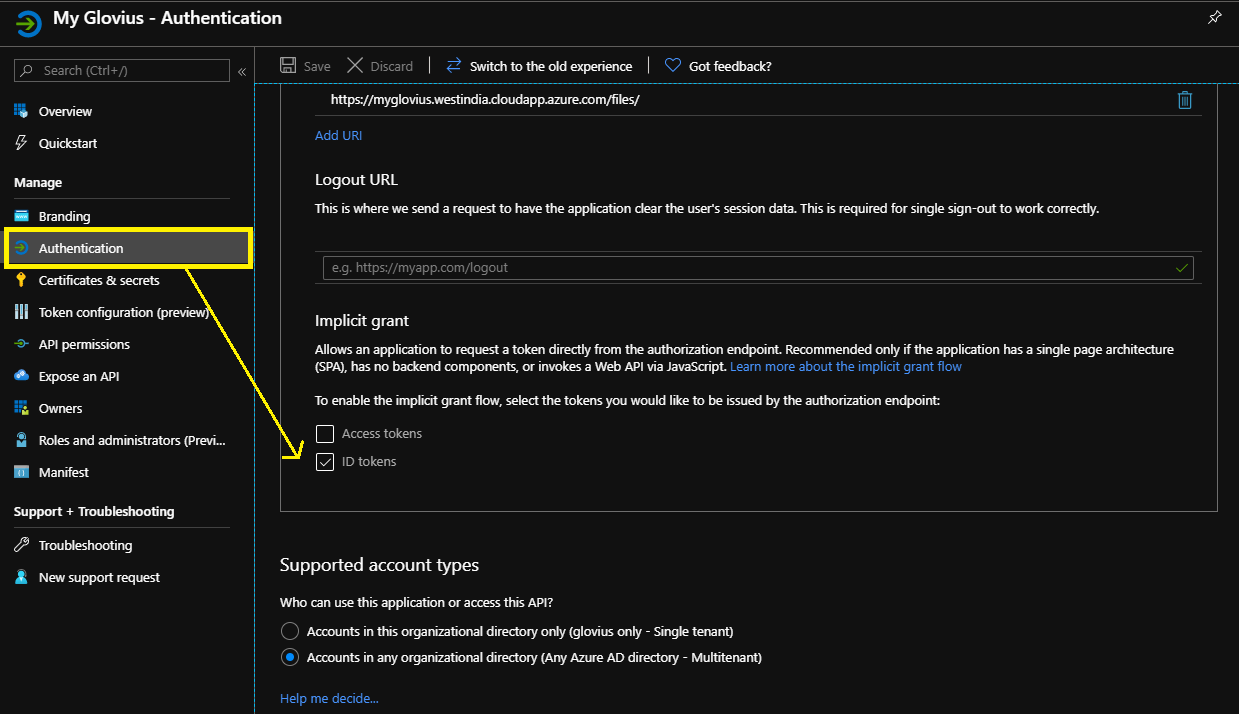
3. Provide Azure AD access to your Glovius application
4. Create Client secret key for the application
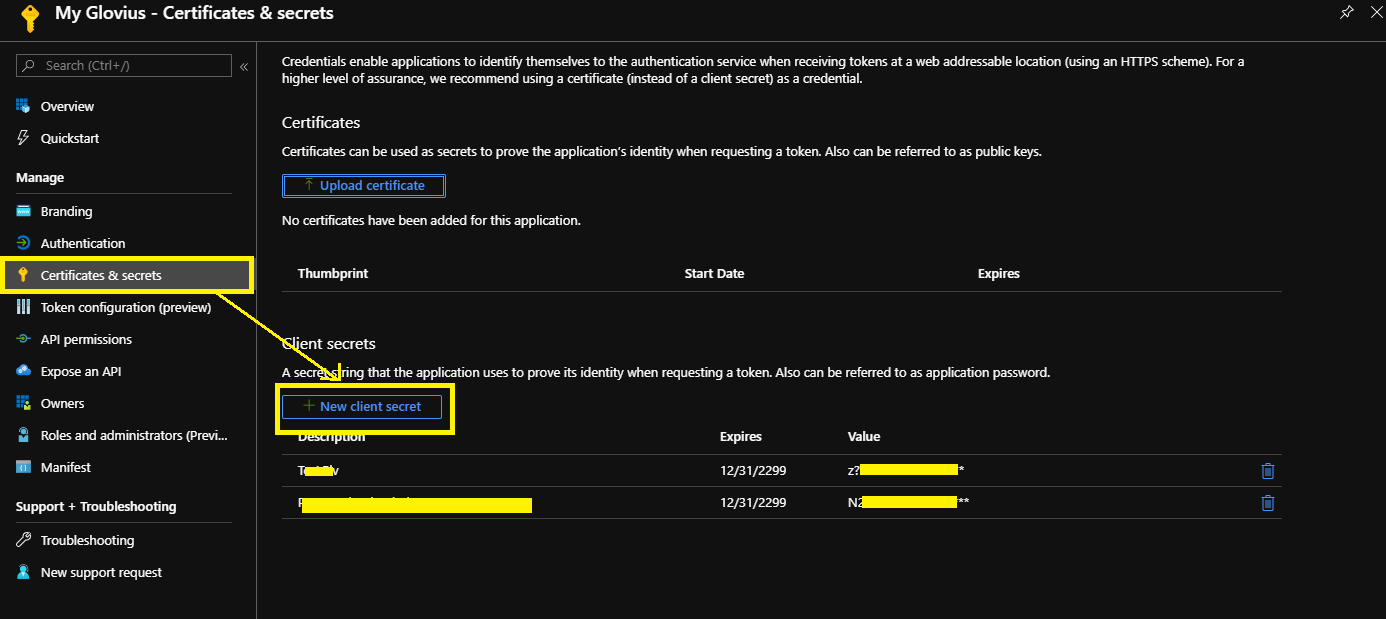
5. Copy the Client secret key and Client (Application) ID. You are going to need it while the deploying the Glovius application.
Steps
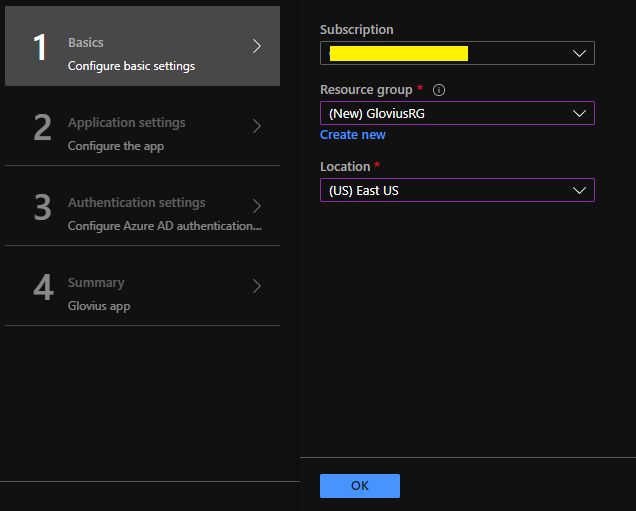
1. Find the Glovius Cloud in the Marketplace and click on Create.2. In the Basic steps
- choose the Subscription where to deploy the Glovius resource
- create a new or use an existing but empty Resource group
- choose resource group Location
then click on OK.
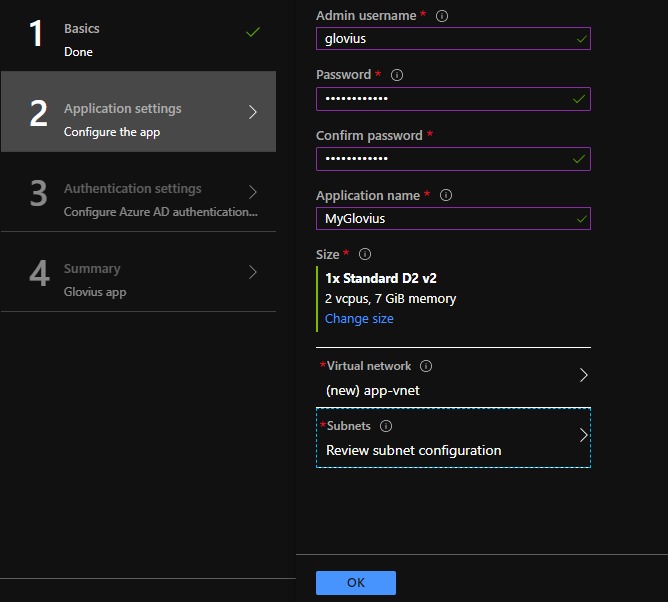
3. In Application settings
- choose the Username and Password for the VM where the application is being deployed
- assign a name to your Azure application. Please note that final URL of your application will be https://< app_name >.< location >.cloudapp.azure.com/ e.g. https://myglovius.eastus.cloudapp.azure.com/.
- select the VM size. As per our recommendation, by default a VM with 2Core, 7GB RAM VM is selected
- select Virtual Network name or keep the default value
- select Subnet required for the application or keep the default value
then click on OK.
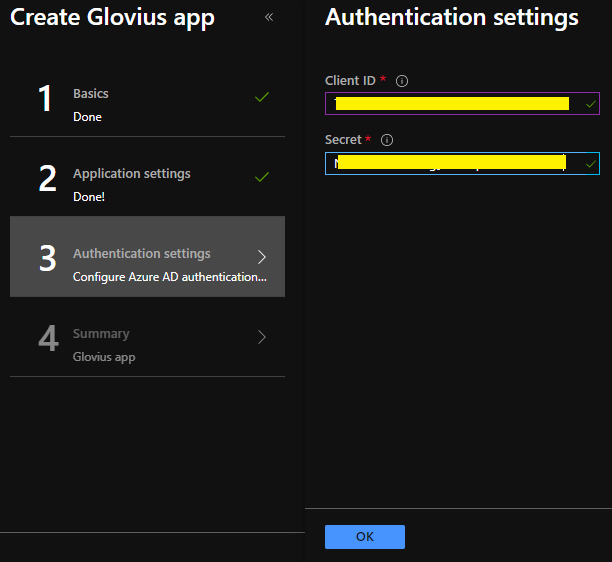
4. In Authentication settings
- enter client ID and client secret for your application which you registered as Azure AD Application
then click on OK.
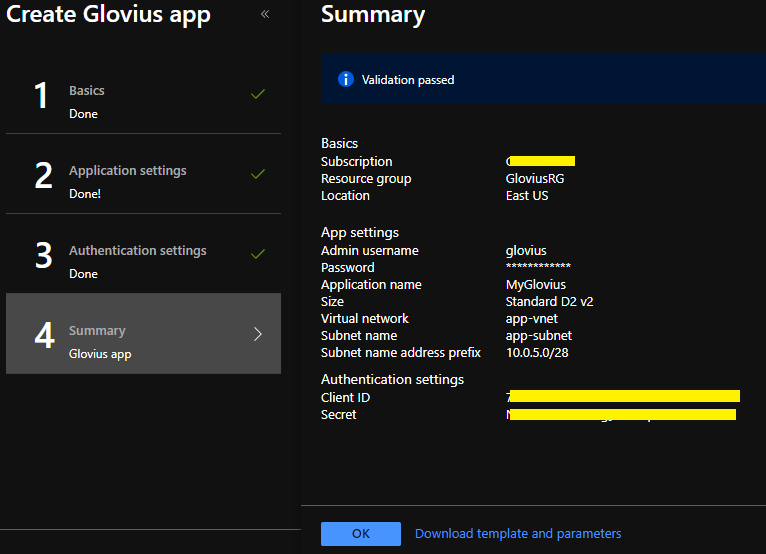
5. In the Summary step review your settings, then click on OK.
6. It will take approx. 30 minutes to setup entire application.
Your application's final URL will be https://< app_name >.< location >.cloudapp.azure.com/
7. Confirm if your application URL and the Azure AD application URL are same.
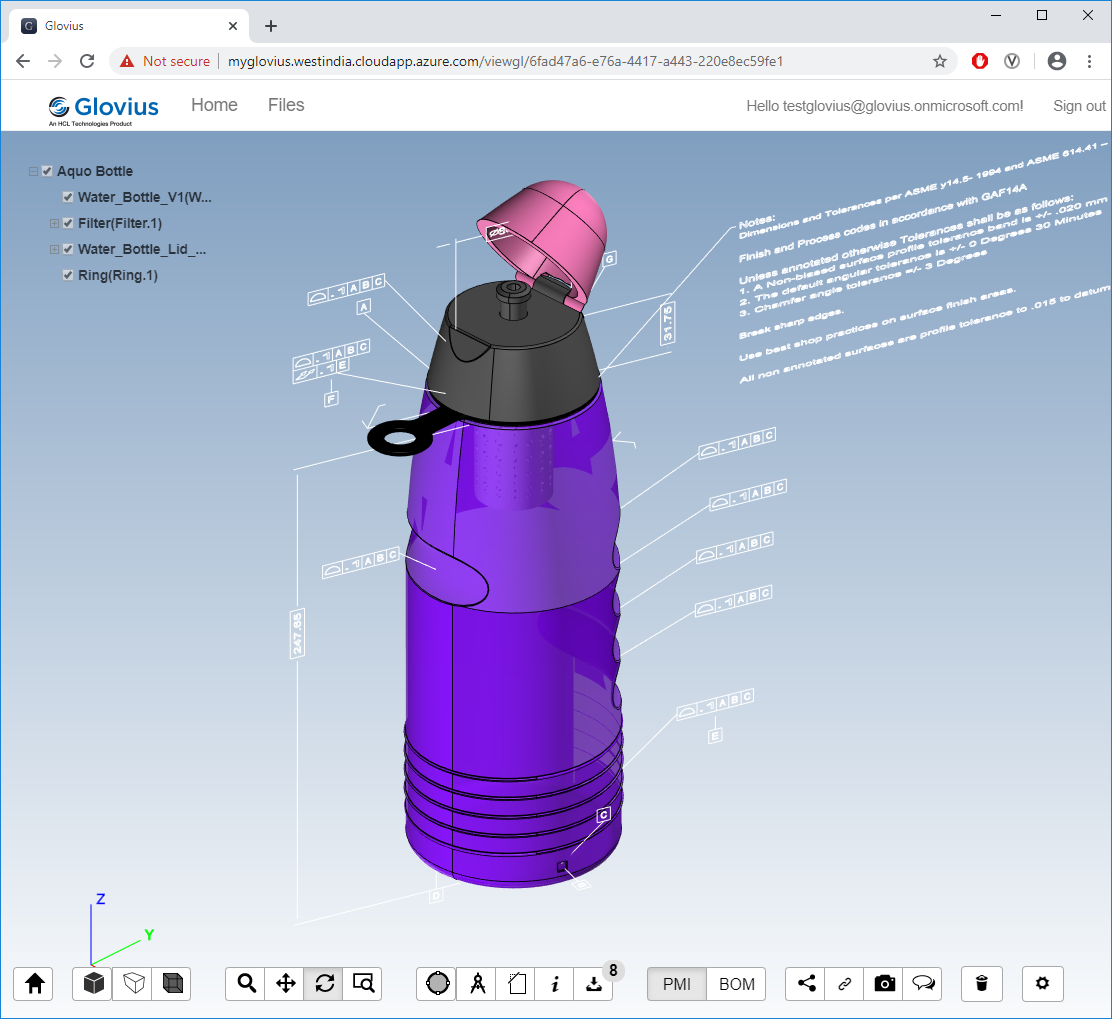
1. Browse to https://< app_name >.< location >.cloudapp.azure.com/ to access your Glovius Application
Ignore certificate error if it prompts any.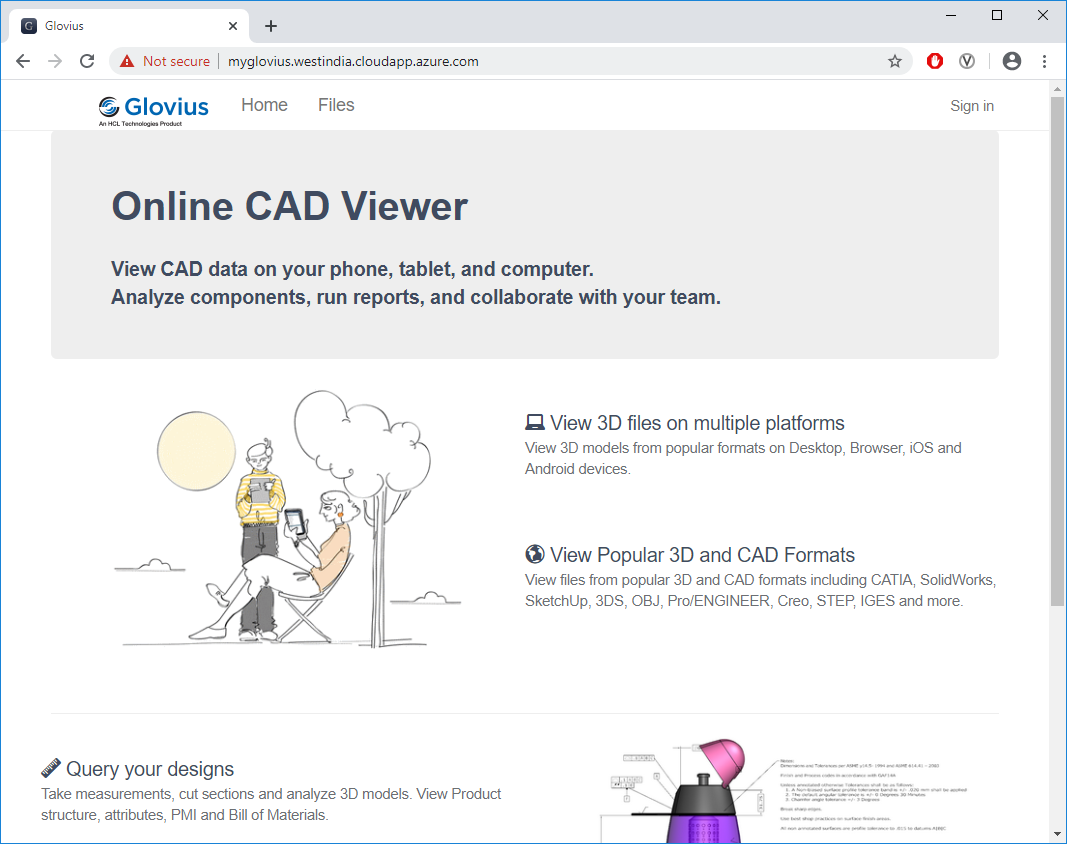
2. Browse to https://< app_name >.< location >.cloudapp.azure.com/license for License configuration
Follow the steps mentioned to activate your Glovius Application3. Your Glovius application is ready for use!!
This section describes step by step instructions of how to deploy Glovius Android for Enterprise
Prerequisite
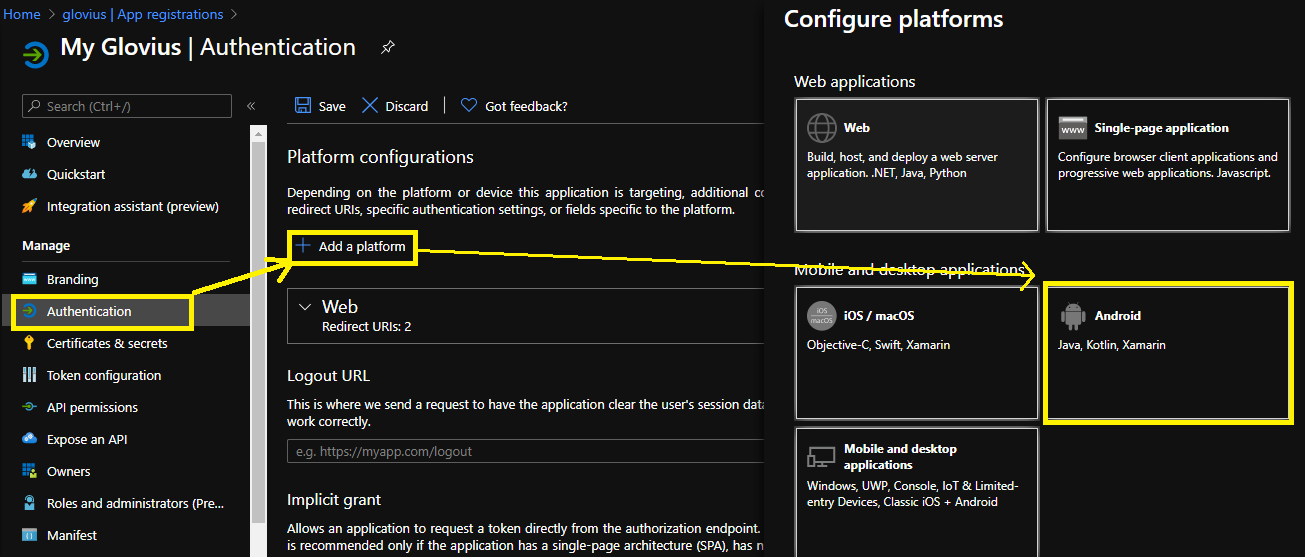
This section contains step by step instructions of how to setup Azure Active Directory authentication to Glovius Android application in the Azure Portal.1. In the Azure Active Directory pane click on App Registrations and open the registered application
2. Goto Authentication tab, Add a platform as Android
3. Enter following values to configure Azure AD authentication for Glovius Android app
Package name : com.geometricglobal.gloviusenterprise
Signature hash : /m1qxF8e4ijh7R0dNUbHSkLXlPg=

1. Download Glovius for Android App installable (APK) file from https://glovius1.azureedge.net/Marketplace/GloviusEnterprise.apk to your Android smartphone or tablet
2. Install the Glovius APK on your Android smartphone or tablet. Allow installation of apps from source other than Play store to install the app.
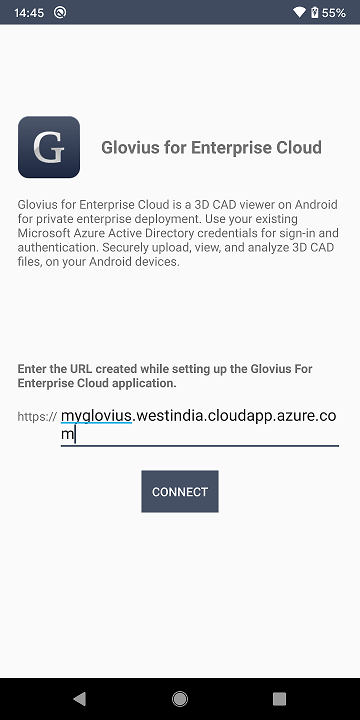
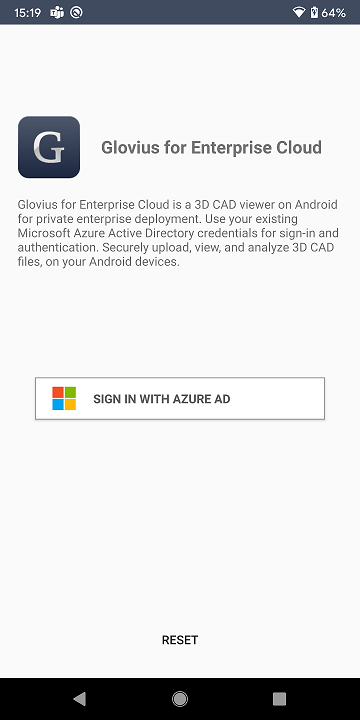
3. Launch the Glovius App on your Android device and enter the URL created while setting up Glovius for Enterprise Cloud application
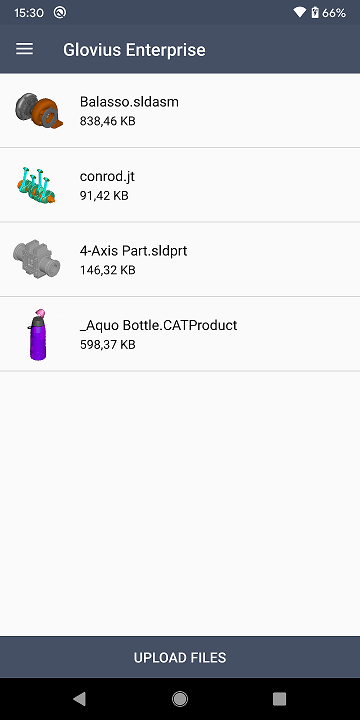
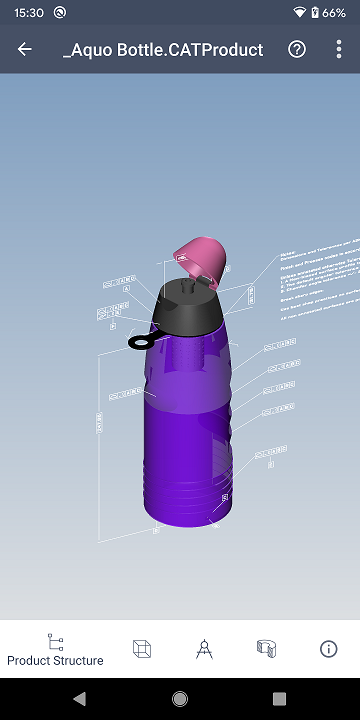
After successful configuration, login with your Azure AD credentials to access your 3D CAD files
2. Install the Glovius APK on your Android smartphone or tablet. Allow installation of apps from source other than Play store to install the app.
3. Launch the Glovius App on your Android device and enter the URL created while setting up Glovius for Enterprise Cloud application
After successful configuration, login with your Azure AD credentials to access your 3D CAD files
Your Glovius for Android app is ready for use!!
Get in touch with support@glovius.com for any technical support or feedback